Friday, August 30, 2024

Discover the Beauty of Canvas Prints

Discover the Beauty of Canvas Prints
Are you looking to add a touch of elegance and personality to your living space? Allow me to introduce you to the wonderful world of canvas prints! In recent years, canvas prints have become a popular choice for home décor, offering a unique way to showcase your favorite photos and artwork. Let's delve into the beauty of canvas prints and explore why they make a fantastic addition to any room.

What are Canvas Prints?


Canvas prints are a contemporary and stylish way to display your photos or artwork. They involve printing your chosen image onto high-quality canvas material, which is then stretched and wrapped around a wooden frame. This creates a sleek, modern look that can instantly elevate the ambiance of any room.

Why Choose Canvas Prints?


There are several reasons why canvas prints have gained so much popularity. Firstly, they offer a professional and polished finish that can make your photos or artwork truly stand out. The texture of the canvas adds depth to the image, giving it a more tactile and artistic feel compared to traditional photo frames.
Furthermore, canvas prints are incredibly versatile. Whether you want to showcase a cherished family photo, a breathtaking landscape, or a piece of abstract art, canvas prints can bring your vision to life in a stunning and impactful way. They can easily complement any décor style, from minimalistic and modern to cozy and eclectic.

Customization Options


One of the best things about Image Square Printing canvas prints is the level of customization they offer. You can choose the size of the print to perfectly fit your space, whether you want a small accent piece or a bold statement wall. Additionally, many printing companies allow you to select the frame thickness and color to suit your preferences.
Moreover, some providers even offer the option to add special effects to your canvas prints, such as black and white conversion, sepia tones, or pop art filters. This allows you to create a truly unique and personalized piece of art that reflects your individual style and taste.

Durability and Longevity


Unlike traditional paper prints, canvas prints are highly durable and long-lasting. The canvas material is resistant to fading and warping, ensuring that your cherished memories will look vibrant and fresh for years to come. This makes canvas prints a wise investment for those looking to adorn their walls with timeless pieces of art.

Easy to Hang and Maintain


Another advantage of canvas prints is how easy they are to hang and maintain. Most canvas prints come ready to hang, with a pre-installed hook or wire on the back. This eliminates the need for additional framing or mounting and allows you to enjoy your new artwork hassle-free.
In terms of maintenance, canvas prints are a breeze to clean. Simply use a soft, dry cloth to gently dust off any dirt or debris that may accumulate over time. This quick and simple cleaning process ensures that your canvas prints remain looking pristine with minimal effort.

Where to Use Canvas Prints


The beauty of canvas prints lies in their versatility and ability to enhance any room in your home. Whether you want to spruce up your living room, bedroom, home office, or even your kitchen, canvas prints can add a touch of elegance and personality to any space.
Consider creating a gallery wall with a collection of canvas prints in varying sizes and layouts for a dynamic and eye-catching display. Alternatively, opt for a single large canvas print to serve as a striking focal point in a room. The possibilities are endless when it comes to incorporating canvas prints into your decor.

The Bottom Line


In conclusion, canvas prints offer a beautiful and customizable way to showcase your favorite photos and artwork. With their professional finish, durability, and ease of maintenance, canvas prints are a fantastic choice for adding a touch of sophistication to any room in your home. Whether you prefer a classic family portrait, a scenic landscape, or a bold abstract design, canvas prints can help you bring your vision to life in a stunning and impactful way. So why wait? Discover the beauty of canvas prints today and transform your living space into a personalized art gallery.
Image Square Printing
https://imagesquareprinting.com/canvas-prints/

5 Creative Ideas for Using Window Graphics in Your Business

5 Creative Ideas for Using Window Graphics in Your Business
Do you want to make your business stand out and attract more customers? Window graphics are a fantastic way to enhance your storefront and create a lasting impression. Not only do they provide privacy and protection from the sun, but they also serve as a powerful marketing tool to promote your brand and bring in foot traffic. In this blog post, I will share five creative ideas for using window graphics in your business that will help you draw attention and boost your sales.

1. Showcase Your Products


One of the most effective ways to use window graphics is by showcasing your products or services. You can create eye-catching displays that highlight your best-selling items or promote a new product launch. By placing attractive graphics on your windows, you can pique the curiosity of passersby and entice them to step inside your store to learn more. Make sure to use high-quality images and bold text to make your products stand out and drive sales.

2. Promote Your Special Offers


Another great way to leverage window graphics is by promoting your special offers and discounts. Whether you're running a seasonal sale, a limited-time promotion, or a clearance event, window graphics can help you grab the attention of potential customers and encourage them to take advantage of your deals. Use vibrant colors, compelling messages, and clear call-to-action phrases to entice people to make a purchase. Don't forget to include any necessary details such as the duration of the offer or any promo codes.

3. Create a Sense of Brand Identity


Window graphics can also be used to reinforce your brand identity and make your business more recognizable. Whether you choose to display your logo, mission statement, or brand colors, these graphics can help create a cohesive and memorable visual identity that sticks in the minds of your customers. Consistency is key here, so make sure your window graphics align with your overall brand image and values to convey a strong and unified message to your target audience.

4. Share Important Information


Utilize window graphics to communicate important information about your business, such as your operating hours, contact details, or upcoming events. By displaying this information prominently on your storefront, you can make it easier for customers to find and engage with your business. Consider using large, easy-to-read text and symbols to ensure that the information is accessible and digestible at a glance. This can help improve customer satisfaction and streamline their experience with your brand.

5. Create Seasonal Decorations


Get into the spirit of the season by using window graphics to create festive decorations that align with holidays or special events. Whether it's Halloween, Christmas, Valentine's Day, or a local festival, seasonal window graphics can add a touch of charm and personality to your storefront. From snowflakes and pumpkins to hearts and fireworks, there are endless creative possibilities to celebrate different occasions and connect with your community. Keep your decorations fresh and updated to stay relevant and engage with your audience all year round.

The Bottom Line


Window graphics are a versatile and cost-effective marketing tool that can help you elevate your business and attract more customers. By implementing these five creative ideas, you can leverage the power of window graphics to enhance your storefront, promote your products, and build a strong brand presence. Whether you're a retail shop, restaurant, or service provider, window graphics offer endless possibilities to showcase your creativity and drive success. Experiment with different designs, colors, and messages to find what resonates best with your target audience and watch your business flourish.
Image Square Printing
https://imagesquareprinting.com/window-graphics/

Wednesday, August 28, 2024

Unlocking the Power of Decals: A Complete Guide to Effective Branding

Unlocking the Power of Decals: A Complete Guide to Effective Branding
Imagine your brand’s identity boldly displayed on windows, walls, and vehicles everywhere. That’s the transformative impact decals can have on your branding strategy. From eye-catching stickers on laptops to large-scale decals on storefronts, this versatile tool is a game-changer for businesses of all sizes.
Decals offer a cost-effective and highly visible way to promote your brand, allowing for creative freedom and instant recognition. Whether you’re a startup aiming to make a mark or an established business looking to refresh your image, decals can speak volumes.
In this guide, we’ll delve into the world of decals, uncovering their potential to elevate your brand. You’ll learn about different types of decals, best practices for design, and tips for strategic placement. Get ready to unlock a new level of branding success with the simple yet powerful decal.

Choosing the Right Decal Design for Your Brand


Picking the perfect decal design is a critical step in making sure your brand truly stands out. The design should not only be eye-catching but also reflect the core values and aesthetics of your brand.
Begin by considering your brand’s color scheme. Consistent use of colors helps people instantly recognize your brand. Next, think about your logo and how it can be incorporated into the decal. A clear, recognizable logo is a must-have feature.
Simplicity is key. Overcomplicating the design can make it look cluttered and detract from your message. Aim for a clean look that communicates your brand's essence in a glance.
Don't forget about size and shape. The right dimensions will ensure that the decal fits perfectly wherever it's placed, from tiny laptop stickers to large window displays.
Lastly, quality matters. Invest in high-quality materials that withstand the test of time and elements. A durable decal reinforces a perception of trust and reliability in your brand.
By focusing on these elements, you can create a decal design that not only grabs attention but also leaves a lasting positive impression of your brand.

Placement Strategies: Where to Put Your Brand Decals


Now that you have an awesome decal design, it’s time to think about where to place them for maximum impact. Placement is everything when it comes to getting your brand noticed.
Think About Visibility
High-traffic areas are goldmines for visibility. Placing decals on store windows, business vehicles, or even community bulletin boards can capture the attention of passersby. The goal is to be seen by as many people as possible.
Don’t overlook the power of smaller, personal items. Laptops, phone cases, and water bottles are great for spreading your brand in everyday settings. When your customers display your decals on their belongings, they become brand ambassadors.
Community events and trade shows offer excellent opportunities to distribute your decals. These places are filled with potential customers who are interested in what you have to offer.
Creativity Pays Off
Get creative with placement to make your brand stand out even more. Unusual locations like skateboards, guitars, and even surfboards can give your brand an edge and align with a specific lifestyle or audience.
Remember, the key is to think about where your target audience spends their time. Tailoring your placement strategy to where your audience hangs out will ensure your efforts are well received.
By carefully choosing where to place your brand decals, you can maximize your reach and create a memorable impression on both current and potential customers.

Decal Material Matters: Selecting the Best Material for Durability


Choosing the right material for your decals is crucial. You want something that looks good and stands the test of time. Not all materials are created equal, so let's dive into what works best.
Vinyl is a popular choice for good reason. It's durable, weather-resistant, and versatile enough for both indoor and outdoor use. Vinyl decals can withstand the elements, making them perfect for car windows, storefronts, and outdoor events.
Another excellent option is polyester. It's also highly durable and can handle exposure to sunlight and water. Polyester is great for high-quality prints where clarity and detail are important.
Paper decals are cheaper but aren’t as durable. They work well for short-term promotions or indoor use. If you're planning a temporary campaign, paper might be the way to go.
Don’t forget about the adhesive quality as well. A strong adhesive ensures your decal stays put, while a removable option allows for easy repositioning without residue.
Considering where and how your decals will be used can help you select the best material for the job. Durable materials ensure your branding efforts remain effective for as long as possible.

Decal Application Techniques for a Professional Finish


When it comes to applying your decals, the technique you use can make all the difference. You want that polished, professional look, right? Here’s how to get it.
First, make sure the surface is clean and dry. Any dust, dirt, or grease can prevent the decal from sticking properly. Use a mild soap and water solution, then dry the area thoroughly.
Next, position your decal before peeling off the backing paper. Use masking tape to secure it in place temporarily. This way, you can adjust the placement until it’s just right. Once you're happy with the position, peel one side of the backing and start applying the decal from one end to the other.
Use a squeegee or a credit card to smooth out the decal. Apply firm, even pressure and work out any air bubbles as you go. Bubbles can be a big no-no, but a pin or needle can help pop any stubborn ones. Just be gentle!
Take your time peeling off the transfer tape. Slow and steady wins the race here. Pull it back at a sharp angle to avoid tearing or lifting the decal.
Heat and Pressure
If you’re working with a vinyl decal on a contoured surface, a little heat can go a long way. A hairdryer or heat gun set on low can help soften the vinyl, making it easier to mold around curves and edges. Be careful, though; too much heat can damage the decal.
Wrap things up with a bit more squeegeeing to ensure everything is firmly adhered. The extra effort will result in a sleek, professional finish that will make heads turn.

Maximizing Brand Exposure: Using Decals Across Different Marketing Channels


Decals aren't just for cars and windows; they're versatile marketing tools that can help maximize your brand exposure across various channels.
Start with your storefront. Window decals can showcase promotions, new arrivals, or simply your logo to catch the eye of passersby. It's a cost-effective way to make your business stand out on a busy street.
Trade shows and events are another excellent opportunity. Use decals on your booth displays, tables, and even giveaway items like water bottles or notebooks. A well-branded booth can leave a lasting impression on attendees.
Don't forget about your vehicles. Car decals turn your fleet into mobile billboards. Whether it's a delivery van or the company car, you're getting your brand out there every time it hits the road.
Inside your office, decals can reinforce your brand identity. Use them on walls, doors, and even floors for a cohesive look. It creates a memorable experience for anyone who walks through your doors.
Lastly, include decals in your packaging. Branded stickers on shopping bags, shipping boxes, or product packaging can delight your customers and make your brand stick—literally!
By leveraging decals across these different marketing channels, you're not just decorating—you're building a consistent and far-reaching brand presence.

Tracking Success: Measuring the Impact of Decals on Your Branding Efforts


So, you've covered your bases with decals in all the right places, but how do you know they're making an impact?
Start by setting clear goals. Are you looking to increase foot traffic to your store, generate more website visits, or boost overall brand recognition? A clear goal will help guide what you track.
Customer feedback is gold. Encourage customers to share where they saw your decals. Simple surveys or social media polls can yield valuable insights into how effective your decals are.
Keep an eye on foot traffic if you’ve used decals in physical locations. More visitors to your store or booth can be a sign that your visuals are working their magic.
Online metrics matter too. Custom URLs or QR codes on your decals can track how much traffic is being driven to your website. Monitor these analytics to measure direct engagement.
Social media is another great tracking tool. Look for mentions, shares, or photos of your decals posted by customers. This kind of organic engagement is a fantastic indicator of your campaign's reach.
By mixing these methods, you'll get a well-rounded view of how your decals are performing. It's all about connecting the dots to see how these small but mighty tools are boosting your brand.

The Bottom Line: Leveraging Decals for Long-Term Brand Growth


In conclusion, decals are more than just sticky pieces of vinyl – they're powerful tools for brand growth. When used creatively and strategically, they can significantly enhance your brand's visibility and reach.
One key takeaway is the importance of thoughtful placement. By targeting high-traffic areas and locations your audience frequents, you can ensure your decals make the biggest impact.
Engaging designs and clear, compelling messages are crucial. Your decals should not only catch eyes but also communicate your brand's essence quickly and effectively.
Another essential point is tracking your efforts. Set clear goals and use various methods to measure the success of your decals, from customer feedback to online analytics. This data will help you refine your approach over time.
Additionally, don’t underestimate the value of integrating your decals with your digital marketing strategies. By directing people to your website or social media, you can create a cohesive brand experience that spans both physical and digital spaces.
In essence, decals offer a cost-effective, versatile, and engaging way to boost your brand's presence. With the right strategy and continuous effort, these small tools can pave the way for significant long-term brand growth.
So, next time you’re thinking about ways to enhance your branding, consider giving decals a try. They're simple yet powerful, and when done right, they can help you make a lasting impression that drives your business forward.
Image Square Printing
https://imagesquareprinting.com/decals/

Tuesday, August 27, 2024

Beautiful Wallpapers to Brighten Your Day

Beautiful Wallpapers to Brighten Your Day
Are you looking to add a touch of elegance and positivity to your daily life? One simple way to uplift your mood and brighten your day is by changing your desktop or phone wallpaper to something beautiful and inspiring. In this digital age, we spend a significant amount of time in front of screens, so why not make that time a bit more enjoyable with some stunning wallpapers?

Why Wallpapers Matter


Wallpapers may just seem like a background image, but they can have a significant impact on our mood and mindset. Imagine looking at a dull, uninspiring wallpaper every day versus a vibrant and uplifting one – the difference is palpable. A beautiful wallpaper has the power to energize you, spark creativity, and even evoke positive emotions.

Types of Wallpapers


There are endless options when it comes to wallpapers – from breathtaking landscapes and mesmerizing patterns to motivational quotes and adorable animals. Whatever your style or preference, there is a wallpaper out there that can resonate with you. You can choose wallpapers that reflect your personality, goals, or simply ones that make you smile.

Where to Find the Best Wallpapers


Finding the perfect wallpaper can be a fun adventure. There are numerous websites and apps dedicated to curating high-quality wallpapers for all devices. Whether you're into minimalist designs, bold colors, or intricate illustrations, these platforms offer a wide selection to suit every taste.
Image Square Large Format Printing is a member of DreamScapes Print Provider Network.

DIY Wallpapers


Feeling creative? Why not design your own wallpapers? You don't need to be a graphic designer to create something unique. Use your favorite photos, add inspirational quotes, or play around with graphic elements to make a wallpaper that is truly one-of-a-kind. Personalized wallpapers can have an even more significant impact on your mood as they reflect your individuality.

Changing Your Wallpaper Regularly


Don't be afraid to switch up your wallpapers every now and then. Just like changing the décor in your living space can freshen up the atmosphere, changing your wallpaper can bring a new vibe to your digital environment. Plus, it's a simple and low-cost way to add a little excitement to your daily routine.

Tips for Choosing the Right Wallpaper


- Resolution: Ensure the wallpaper you choose matches the resolution of your device for the best quality.
- Clutter: Avoid wallpapers that are too busy or cluttered, as they can be distracting.
- Color Scheme: Consider the colors in the wallpaper and how they make you feel – vibrant colors can be energizing while softer tones can be calming.
- Theme: Choose a wallpaper that resonates with you personally, whether it's nature, abstract art, or your favorite quote.

Recommended Wallpaper Apps


If you're looking for a convenient way to discover new wallpapers regularly, consider downloading some of these popular wallpaper apps:
- Walli – HD Wallpapers & Backgrounds: A community-driven app with a vast collection of unique wallpapers created by artists from around the world.
- Google Wallpapers: Provides a curated selection of high-quality wallpapers that automatically refresh daily.

Embrace the Beauty of Wallpapers


In a world filled with screens and digital distractions, taking the time to select beautiful wallpapers for your devices may seem like a small gesture. However, the impact it can have on your mood and overall well-being should not be underestimated. So, why not treat yourself to a visual delight and choose wallpapers that bring a smile to your face every time you look at them?

The Bottom Line


Beautiful wallpapers have the power to transform your digital space and brighten your day with just a glance. Whether you opt for scenic landscapes, inspiring quotes, or quirky illustrations, the key is to choose wallpapers that resonate with you and evoke positive emotions. So, go ahead, explore the world of wallpapers, and let your device screen be a reflection of your unique style and personality. Happy wallpaper hunting!
Image Square Printing
https://imagesquareprinting.com/wallpapers/

Monday, August 26, 2024

Transform Your Space with Stunning Wall Murals

Transform Your Space with Stunning Wall Murals
Ever looked at your plain walls and felt they needed a spark? Wall murals might be the game-changer you’re seeking. These larger-than-life artworks can instantly breathe life into any room, turning blank spaces into mesmerizing works of art.
Imagine walking into a space that tells a story—whether it's a tranquil forest, a bustling cityscape, or an abstract design—murals can transport you to a different world without leaving the comfort of your home. They offer a unique way to express your personality and creativity.
Plus, wall murals aren’t just for the artistically inclined. With countless designs and options available, it's easy for anyone to find the perfect match for their aesthetic. From soothing tones to bold statements, there’s something out there for every taste and style.
Ready to transform your space? Let’s dive into the world of wall murals and discover how they can redefine your living or working environment.

Why Wall Murals Are the Perfect Choice for Interior Transformation


Wall murals are more than just decorations; they are powerful tools for completely revamping a space. The impact of a well-chosen mural can be profound, making even the smallest room feel more expansive and welcoming.
Image Square Large Format Printing is a member of DreamScapes Print Provider Network
Unique Personalization
Unlike traditional wallpapers and paint, murals offer endless possibilities for customization. You can choose designs that reflect your interests, hobbies, or favorite places, ensuring your space is unmistakably yours. The opportunity to personalize can make your home or office feel truly unique.
Easy and Efficient
One of the great things about murals is how easy they are to install. Many modern murals come in peel-and-stick formats, allowing for a quick transformation without the mess and fuss of traditional wallpaper paste. Plus, if you ever decide to change things up, removing them is a breeze.
Versatility Galore
Whether you’re looking to create a focal point in your living room, add charm to a nursery, or bring a touch of elegance to your office, there is a mural to suit every need. Different designs can evoke various moods, from calm and serene to vibrant and energizing.
In short, wall murals are a fantastic option for anyone looking to make a big change with minimal effort. They are versatile, customizable, and simply stunning. Ready to make a statement?

Choosing the Right Wall Mural Design for Your Space


Picking the perfect wall mural for your space can feel overwhelming, but it doesn’t have to be. The key is to consider the function of the room and the atmosphere you want to create.
Start by thinking about the color scheme of your space. If your room already has a lot of colors, you might want to choose a mural with more neutral tones to avoid clashing. Conversely, a more neutral room can be the perfect canvas for a bold, colorful mural that adds a pop of excitement.
Size matters too! Large, bold designs can make a statement in spacious rooms, while smaller, more subtle patterns work best in compact areas. The design should complement rather than overwhelm the space.
Don't forget to consider the style of the room. A sleek, modern design doesn't necessarily call for a rustic, countryside mural. Make sure the mural you choose aligns with the overall décor theme of your space.
Finally, think about your personal taste and what makes you feel happy and at ease. After all, it’s your space and it should reflect your personality. Whether it's a serene landscape, abstract art, or a whimsical forest, choose something that resonates with you.
By keeping these pointers in mind, you’ll find that selecting the right wall mural design becomes a much simpler, enjoyable process. Happy decorating!

How to Properly Install a Wall Mural Without Hassle


So, you’ve picked out the perfect wall mural and now it’s time to install it. No worries; with a bit of patience and the right technique, you can get it done smoothly.
Gather Your Supplies
First, make sure you have all your supplies ready: a level, measuring tape, a pencil, a smoothing tool, and of course, the mural itself. Having everything at arm's reach makes the process easier.
Prepare the Wall
Next, ensure your wall is clean and smooth. Dust, grease, or bumps can interfere with the adhesive, making the mural harder to apply. Wipe the wall with a damp cloth and let it dry completely before you begin.
Measure and Mark
Measure the wall where the mural will go, and mark guidelines lightly with a pencil. This will help you align it correctly and avoid crooked edges. Trust me, this small step can make a world of difference!
Start Applying
Start from the top corner and slowly peel off the backing while pressing the mural onto the wall. Smooth out any bubbles as you go with your smoothing tool. It’s crucial to take your time here—going slow ensures a cleaner look.
Final Touches
Once the mural is fully applied, go over it one last time with the smoothing tool to press out any remaining air bubbles. Step back and admire your work! If you notice any small bubbles later, a pin can help release the air so you can smooth it out.
And that's it! With these steps, you’ll have a gorgeous wall mural installed in no time, bringing life and personality to your space. Happy decorating!

Inspiring Ideas to Enhance Your Home Décor with Wall Murals


Wall murals are an amazing way to add a splash of creativity and vibrancy to your home décor. If you’re looking for some inspiration, here are a few ideas to get your creative juices flowing.
Why not start with a nature-themed mural? Imagine a serene forest scene in your living room or a calming beach view in your bedroom. These can bring a sense of tranquility and the great outdoors into your home without you having to leave your couch.
For something a bit more modern, consider abstract designs. Bold shapes and colors can turn a blank wall into a statement piece. Perfect for a contemporary living space or office, abstract murals can add a touch of sophistication and intrigue.
If you have kids, murals can transform their bedrooms into a magical world. Think colorful animals, space adventures, or their favorite cartoon characters. It’s a fun way to stimulate their imagination and make their room a place they’ll love spending time in.
Don’t forget about those smaller spaces either. A mural in a hallway or bathroom can make these often-overlooked areas feel just as special as the rest of your home.
Finally, consider a mural that tells your personal story. Family portraits, favorite travel destinations, or even a custom illustration of your home town can add a personal and unique touch.
With so many options, wall murals are a fantastic way to enhance your home décor. They’re not just decorations; they’re a way to express your personality and style in a big way. Happy decorating!

Final Touches: The Bottom Line on Achieving Wall Mural Excellence


So, you’re ready to dive into the colorful world of wall murals? Awesome! Remember, it’s all about choosing what vibes with your style and space. Whether you're a fan of serene landscapes, bold abstracts, or playful children's designs, there's something out there for everyone.
First, take the time to plan your mural. Measure your wall, think about the colors that’ll complement your existing decor, and decide on a theme that makes you smile. A well-thought-out design can totally transform your space and set the right mood.
Another key point is to consider the placement. Murals can dazzle in any room, but placing them strategically can make a bigger impact. For instance, a dramatic mural behind your bed can create a stunning focal point, while a whimsical design in a nursery brings magic to the room.
Also, don’t shy away from getting professional help if needed. Artists and mural companies can bring your vision to life with finesse, ensuring every detail is perfect. But if you’re a DIY enthusiast, go for it! Just make sure you have the right tools and a clear idea of what you want to achieve.
As we wrap up, let’s not forget that wall murals are an opportunity to express yourself. They’re more than just decoration—they’re extensions of who you are and what you love.
In conclusion, achieving wall mural excellence is all about creativity, preparation, and a dash of courage. Embrace the process, have fun with it, and watch how a simple wall can turn into a masterpiece that makes your home truly unique. Happy decorating!
Image Square Printing
https://imagesquareprinting.com/wall-murals/

Saturday, August 24, 2024

How to Convert Low-Resolution Images to High-Resolution Images

How to Convert Low-Resolution Images to High-Resolution Images
Full article: https://imagesquareprinting.com/convert-low-res-image-to-high-res-image/
Are you tired of dealing with low-resolution images that just don't look sharp enough? Whether you want to print them in high quality or simply improve their appearance for a project, there are ways to enhance your images and convert them to high resolution. In this blog post, I will guide you through various methods and tools to help you achieve this. Let's dive in!

Understanding Image Resolution


Before we delve into the conversion process, it's essential to understand what image resolution means. Image resolution refers to the number of pixels in an image. The more pixels an image has, the higher its resolution, resulting in a clearer and more detailed picture. Low-resolution images appear blurry and lack definition when zoomed in, while high-resolution images are sharp and detailed.

Using Photoshop for Image Upscaling


One of the most popular tools for image editing is Adobe Photoshop. To convert a low-resolution image to a high-resolution one using Photoshop, you can utilize the "Image Size" function. Simply open your image in Photoshop, go to the "Image" menu, select "Image Size," and adjust the dimensions and resolution to upscale the image. Keep in mind that while this method can enhance the image, it may not always provide the best results, especially if the original image quality is too low.

Leveraging AI-Powered Tools


Thanks to advancements in technology, there are now AI-powered tools that can upscale images with impressive results. Platforms like Waifu2x, Let's Enhance, and Gigapixel AI use artificial intelligence algorithms to predict and add new details to images during the upscaling process. These tools can help enhance the quality of low-resolution images and make them look closer to high-resolution ones.

Online Image Upscaling Services


If you prefer a hassle-free solution without the need for software installation, online image upscaling services can be a convenient option. Websites like Bigjpg, Vance AI Image Upscaler, and Enhance.Pho.to allow you to upload your low-resolution images and convert them to higher resolutions within minutes. These services are user-friendly and suitable for quick image enhancement tasks.

Using Image Editing Software


Apart from Photoshop, there are other image editing software tools that can assist you in upscaling low-resolution images. Programs like GIMP, Affinity Photo, and Corel PaintShop Pro offer similar functions to Photoshop and allow you to adjust image dimensions and resolutions to enhance image quality. Experimenting with different software can help you find the one that best suits your needs and skills.

Manual Image Enhancement Techniques


For those who enjoy a hands-on approach to image editing, manual enhancement techniques can also be effective in converting low-resolution images. By sharpening, adjusting contrast, playing with colors, and applying filters, you can improve the overall appearance of an image and make it appear crisper and more vibrant. While this method requires more time and effort, it allows for customized image enhancements tailored to your preferences.

Tips for Better Image Upscaling


When upscaling low-resolution images to high resolution, there are several tips to keep in mind for optimal results. Avoid extreme upscaling, as this can lead to pixelation and a loss of image quality. It's also essential to preserve image details and textures during the upscaling process to maintain the image's natural appearance. Experiment with different upscaling methods and settings to find the right balance between quality and file size.

The Bottom Line


Enhancing low-resolution images and converting them to high resolution can significantly improve their visual impact and quality. Whether you opt for AI-powered tools, image editing software, online services, or manual techniques, there are various methods available to help you achieve the desired results. By understanding image resolution and employing the right tools and techniques, you can breathe new life into your images and make them stand out with clarity and detail. Experiment with different methods, unleash your creativity, and enjoy the process of transforming your images into high-resolution masterpieces!
Image Square Printing
https://imagesquareprinting.com/convert-low-res-image-to-high-res-image/

Easy Guide: Converting RGB to CMYK

Easy Guide: Converting RGB to CMYK
Let's dive into the world of color spaces with a simple explanation of how to convert RGB to CMYK. Whether you're a designer, a photographer, or just someone curious about the magic behind colors, understanding this conversion process can be incredibly useful. RGB (Red, Green, Blue) and CMYK (Cyan, Magenta, Yellow, Key/Black) are two primary color models used in different mediums, and knowing how to switch between them can make a significant difference in your projects.
Full article: https://imagesquareprinting.com/how-to-convert-rgb-to-cmyk/

Understanding RGB and CMYK


RGB is commonly used in electronic displays, such as monitors, TVs, and digital cameras. It combines these three primary colors in varying intensities to create a broad array of other colors. On the other hand, CMYK is the standard color model used in printing. It works by overlapping semi-transparent ink in the four colors to produce different hues.

Why Convert from RGB to CMYK?


When you're preparing a design for print, it's crucial to convert your RGB file to CMYK. That's because RGB has a broader color gamut than CMYK, meaning some colors in RGB can't be replicated exactly in print. Converting to CMYK ensures that what you see on your screen is closer to what you'll get in the final printed piece.

Steps to Convert RGB to CMYK


Now, let's walk through the simple steps to convert your RGB file to CMYK using popular design software like Adobe Photoshop:
Step 1: Open Your RGB File
Begin by opening your RGB image in Photoshop. You can do this by selecting "File" and then "Open" from the top menu.
Step 2: Check the Color Mode
Next, check the color mode of your image. You can do this by going to "Image" in the top menu, then selecting "Mode." If it's already in RGB mode, proceed to the next step. If not, you'll need to convert it to RGB before converting to CMYK.
Step 3: Convert to CMYK
To convert your RGB image to CMYK, again go to "Image" in the top menu, then choose "Mode" and finally select "CMYK Color."
Step 4: Adjust as Needed
After converting, you may notice some color shifts due to the change in color gamut. You can make adjustments to the colors to ensure they look as intended in the CMYK color space.

Tips for a Smooth Conversion


- Use CMYK Preview: Always check your colors in CMYK preview mode before finalizing your design to see how they will appear in print.
- Save a Copy: It's a good practice to save a copy of your original RGB file before converting to CMYK, so you can always go back to it if needed.
- Consult with Professionals: If you're not confident in your color conversions, consider consulting with a print professional to ensure the best results.

The Bottom Line


Understanding how to convert RGB to CMYK is a valuable skill for anyone working with digital and print media. By following these simple steps and keeping a few tips in mind, you can ensure that your designs look vibrant and accurate both on-screen and in print. So, next time you're preparing a project for printing, remember the importance of converting your colors correctly. Happy designing!
Image Square Printing
https://imagesquareprinting.com/how-to-convert-rgb-to-cmyk/

Thursday, August 22, 2024

Converting Low Res to High Res Image: A Comprehensive Guide

Converting Low Res to High Res Image: A Comprehensive Guide
Ever found the perfect image, only to realize it’s too blurry or pixelated for your needs? It’s a pretty common problem, but don’t worry, there’s hope! Turning a low-resolution image into a high-resolution marvel is more achievable than you might think.
With the right tools and techniques, you can transform almost any image, boosting its clarity and detail. This guide will walk you through the process, step-by-step.
No more struggling with fuzzy photos or settling for less-than-stellar quality. Whether you’re sprucing up personal photos or preparing professional presentations, by the end of this guide, you’ll be well-equipped to enhance your images like a pro. Ready to dive in? Let’s get started!

Understanding Low Resolution Images


So, what's the deal with low-resolution images? In simple terms, an image’s resolution is all about the amount of detail it holds. A low-resolution image has fewer pixels, which means less detail. This is why it often looks blurry or pixelated when enlarged.
Pixel Density and Image Quality
Think of pixels as tiny building blocks. The fewer the pixels, the larger they need to be to fill the same space, resulting in a blocky appearance. Higher pixel density means more detail and sharper images.
Why does this happen? It often boils down to the original source of the image. Maybe the photo was taken with an old camera or downloaded from a website that compressed it too much. Whatever the reason, the result is a less-than-ideal image.
Why Resolution Matters
Resolution is crucial for various purposes, from printing to web design. A high-resolution image ensures that your content looks clean and professional. It’s especially important for large formats like posters or banners, where any imperfections can be glaringly obvious.
Understanding these basics sets the stage for improving your images. Let’s dive deeper into how you can enhance them in the next sections!

Tools and Software for Converting Images


Alright, now that we know why resolution is important, let's talk about how to improve those low-resolution images with some handy tools and software.
First up, Adobe Photoshop. It might be the most famous image editing tool out there, and for a good reason. Photoshop offers a ton of features that can help you enhance the resolution of your images. The "Preserve Details 2.0" option under the "Image Size" menu is particularly helpful.
Another great option is GIMP (GNU Image Manipulation Program). Think of it as the free alternative to Photoshop. It's open-source and has a range of features to help tweak your images. You can adjust the resolution by using the "Scale Image" function and play around with different algorithms like "Cubic" or "Sinc" for better results.
If you're looking for something straightforward, try online tools like Let's Enhance or Waifu2x. These platforms use AI technology to upscale images without losing much quality. Just upload your image, choose the settings, and voilà, you have a higher-resolution version!
For those working on multiple images, batch processing tools like IrfanView can be a lifesaver. This software allows you to convert and resize a whole folder of images in one go, saving you loads of time.
Each of these tools has its own strengths, so the best one for you will depend on your specific needs. Ready to give them a try?

Step-by-Step Process for Upscaling Images


So you’ve got your tool of choice, and now you’re ready to upscale your images. Let’s break it down into simple steps.
First, open your chosen software. If you're using Photoshop, load your image by clicking on "File" and then "Open."
Next, locate the upscaling option. In Photoshop, go to "Image" and select "Image Size." A window will pop up with different options for resizing.
Choosing the Right Settings
Set your desired dimensions. Remember to keep the "Resample" box checked and choose "Preserve Details 2.0" from the drop-down menu. Adjust the "Reduce Noise" slider to your preference. This helps in keeping the image sharp while reducing any unwanted graininess.
If you’re using an online tool like Let's Enhance, upload your image and choose the scale factor—usually 2x, 4x, or higher. The tool will do the hard work for you, using AI to fill in the details.
For GIMP users, open your image and go to "Image" and then "Scale Image." Enter your new dimensions and choose the algorithm that best suits your needs. "Cubic" and "Sinc" are good options for preserving detail.
Final Touches
After you've resized your image, it might still need a bit of tweaking. Use the sharpening tools available in your software to enhance the details further. In Photoshop, this would be under "Filter" and then "Sharpen."
Save your enhanced image. Always choose a format that supports high resolution like PNG or TIFF, especially if you plan to print or make further edits.
And there you go! With a few simple steps, you can turn those blurry, low-res photos into crisp, high-quality images. Give it a shot and see the difference!

Enhancing Image Quality in Photoshop


Once you’ve upscaled your image, it’s time to make it look even better. Photoshop offers a bunch of tools to help you enhance image quality effortlessly.
First, let’s adjust the brightness and contrast. Head to "Image" in the menu bar, then "Adjustments," and select "Brightness/Contrast." Play around with the sliders until you get the look you want. Increasing contrast can make details pop!
Sharpening Your Image
Next, focus on sharpening. Go to "Filter," hover over "Sharpen," and then select "Unsharp Mask." A panel will appear with sliders for "Amount," "Radius," and "Threshold." Start with subtle adjustments; you don’t want to overdo it.
Now, let’s enhance specific areas of your photo. Use the "Dodge" and "Burn" tools from the toolbox. Dodging lightens parts of the image, while burning darkens them. This is great for bringing out highlights and shadows.
Reducing Noise
If your image looks a bit grainy, reducing noise can help. Navigate to "Filter," then "Noise," and choose "Reduce Noise." Adjust the sliders for strength and preserve details to find a balance that maintains clarity while smoothing out unwanted texture.
Finally, consider adjusting the colors. Return to "Image" -> "Adjustments" and pick "Hue/Saturation." You can boost or tone down specific colors to make your image truly stand out.
Don’t forget to save your enhanced image in a high-quality format like PNG or TIFF. And there you have it—your image should now be sharper, clearer, and more vibrant than ever!

Best Practices for High Resolution Conversion


When converting images to high resolution, it's crucial to follow some best practices to ensure top-notch quality. Here are a few tips to keep in mind:
Start with the Best Quality Source
Always begin with the highest quality source image you have. The better the original, the higher quality your final result will be after conversion. Avoid working with images that are already low resolution or heavily compressed.
Choose the Right Resampling Method
In Photoshop, when enlarging an image, select "Preserve Details 2.0" under the "Image Size" dialog. This method is particularly effective for upscaling and maintaining sharpness. Pay attention to the "Reduce Noise" slider, allowing you to fine-tune your image.
Mind the Aspect Ratio
Ensure you maintain the aspect ratio of your image when resizing. This prevents distortion. In Photoshop, you can lock the aspect ratio by clicking the chain link icon between the width and height fields in the "Image Size" window.
Avoid Over-Editing
While it might be tempting to use every tool available to perfect your image, less is often more. Make subtle adjustments and remember that too much sharpening or noise reduction can make your image look unnatural.
Save in the Right Format
For the best quality, save your high-resolution images in lossless formats like PNG or TIFF. These formats preserve details better than formats like JPEG, which can introduce compression artifacts.
Monitor Calibration
Finally, ensure your monitor is properly calibrated. Accurate colors and brightness levels on your screen help you make precise edits, leading to better high-resolution results.
By following these best practices, you can achieve clear, sharp, and high-quality images that stand out in any context.

The Bottom Line: Ensuring Quality in Image Conversion


In summary, converting images to high resolution is more than just a technical process—it's an art form that requires attention to detail. Starting with the best quality source image sets the foundation for successful conversion. Using the right resampling methods and preserving the aspect ratio ensures that the final product remains sharp and undistorted.
Additionally, it’s essential to avoid over-editing your images. Subtle adjustments can make a world of difference without sacrificing the natural look of your image. Always remember to save in formats that preserve the integrity of your edits, such as PNG or TIFF.
Besides this, don’t underestimate the importance of a calibrated monitor. Accurate color representation on your screen ensures that your edits translate well across different devices and print mediums.
By adhering to these best practices, you can elevate the quality of your images, making them more visually appealing and professional. High-resolution images are crucial for various uses, from printing to digital displays, and mastering this skill can set you apart.
In the end, quality image conversion boils down to good habits and thoughtful techniques. Keep refining your skills and stay updated with the latest tools and methods. Your audience will notice and appreciate the extra effort put into high-resolution, stunning images.
Image Square Printing
https://imagesquareprinting.com/converting-low-res-to-high-res-image/

Wednesday, August 21, 2024

Unlocking the Potential of Vinyl Printing for Stunning Marketing Materials

Unlocking the Potential of Vinyl Printing for Stunning Marketing Materials
In the ever-evolving world of marketing, there's one timeless medium that continues to stand out and capture attention – vinyl printing. Whether you're looking to create eye-catching banners, vibrant posters, or unique promotional materials, vinyl printing offers a world of possibilities for unlocking your marketing potential.

Understanding the Basics of Vinyl Printing


So, what exactly is vinyl printing? At its core, vinyl printing involves using a special printer that uses UV-curable inks to print directly onto vinyl material. This process results in durable, weather-resistant prints that are perfect for both indoor and outdoor use.

The Versatility of Vinyl


One of the key reasons why vinyl printing is such a powerful tool for marketers is its unparalleled versatility. From small stickers to large banners, vinyl printing can be used to create a wide range of marketing materials that cater to different needs and budgets.
Banners that Command Attention
Vinyl banners are a popular choice for businesses looking to make a big impact at events, trade shows, or storefronts. With vibrant colors, high-quality printing, and custom sizing options, vinyl banners are a versatile marketing tool that can help your brand stand out in a crowded marketplace.
Posters that Pop
In a world saturated with digital ads, a well-designed poster can still make a significant impact. Vinyl printing allows you to create posters that pop with crisp images, bold colors, and a professional finish that commands attention.
Stickers that Stick
Stickers may seem small, but they pack a powerful punch when it comes to marketing. With vinyl printing, you can create custom stickers that adhere to a variety of surfaces, making them perfect for everything from product labeling to guerrilla marketing campaigns.

Tips for Creating Stunning Marketing Materials with Vinyl Printing


Now that you understand the basics of vinyl printing and its versatile applications, let's delve into some tips for creating stunning marketing materials that will help your brand shine.
Invest in Quality Design
Before you hit the print button, make sure you invest in quality design that aligns with your brand identity and resonates with your target audience. Whether you're creating a banner, poster, or sticker, design plays a crucial role in the effectiveness of your marketing materials.
Choose the Right Material
When it comes to vinyl printing, not all materials are created equal. Be sure to choose a high-quality vinyl material that suits the intended use of your marketing materials. Whether you need something durable for outdoor use or a more cost-effective option for indoor applications, selecting the right material is key to achieving the desired results.
Prioritize Legibility
No matter how visually appealing your marketing materials may be, they won't be effective if they're not legible. Pay close attention to font size, color contrast, and overall readability to ensure that your message is clear and easy to understand.
Don't Forget About Branding
Every piece of marketing material you create should reinforce your brand identity and messaging. Make sure to include your logo, brand colors, and tagline prominently to ensure that your audience can easily identify and connect with your brand.

The Bottom Line


In conclusion, vinyl printing is a powerful tool that can help you unlock the full potential of your marketing materials. From banners and posters to stickers and beyond, vinyl printing offers endless possibilities for creating stunning, eye-catching materials that resonate with your audience. By understanding the basics of vinyl printing, exploring its versatility, and following some key design tips, you can elevate your marketing efforts and make a lasting impact in a competitive marketplace.
Image Square Printing
https://imagesquareprinting.com/vinyl-printing/

How to Improve Your Website's SEO with High-Quality Images and Avoid Using Low-Resolution Images

How to Improve Your Website's SEO with High-Quality Images and Avoid Using Low-Resolution Images
In today's digital age, having a strong online presence is crucial for any business or individual looking to attract and engage with their target audience. Search engine optimization (SEO) plays a significant role in determining how easily your website can be found by users on search engines like Google. While most people focus on keywords and metadata to improve their SEO rankings, the quality of the images on your website also plays a vital role in enhancing your SEO efforts.
Importance of High-Quality Images in SEO
High-quality images not only make your website visually appealing but can also help improve your website's SEO rankings. When users conduct image searches on search engines, high-quality images are more likely to appear at the top of the search results. This can drive more traffic to your website and increase your online visibility.
Search engines like Google also consider the relevance and quality of images when ranking websites. By using high-quality, relevant images on your website, you can improve the overall user experience, reduce bounce rates, and increase the amount of time users spend on your site. This, in turn, can have a positive impact on your SEO rankings.
The Impact of Low-Resolution Images on SEO
On the flip side, using low-resolution images can harm your SEO efforts. Low-quality images can make your website appear unprofessional and can negatively impact the user experience. Users are more likely to click away from your site if they encounter blurry or pixelated images, leading to higher bounce rates and lower engagement metrics.
From an SEO perspective, search engines may penalize your website if it contains a large number of low-quality images. Search engine algorithms are designed to prioritize websites that provide a positive user experience, and low-resolution images can signal to search engines that your website may not offer valuable or relevant content. This can result in lower rankings on search engine results pages (SERPs) and fewer organic visitors to your site.
seo text
Tips for Using High-Quality Images to Improve SEO
Now that we understand the importance of high-quality images in SEO, let's explore some tips on how you can leverage images to enhance your website's SEO performance:
- Optimize Image File Names: Before uploading images to your website, make sure to optimize the file names using descriptive keywords related to the image content. Search engines use file names to understand the context of an image, so using relevant keywords can help improve your SEO rankings.
- Use Alt Text: Alt text, or alternative text, is a brief description of an image that appears if the image fails to load on a webpage. Including descriptive alt text for your images not only improves accessibility but also provides search engines with valuable information about the image content, which can boost your SEO rankings.
- Compress Images: Large image files can slow down your website's loading speed, which can negatively impact your SEO rankings. Use image compression tools to reduce the file size of your images without compromising quality. This can help improve your website's performance and user experience.
- Optimize Image Sizes: Ensure that your images are appropriately sized for the web to prevent them from appearing distorted or pixelated. Find the right balance between image quality and file size to enhance user experience and SEO performance.
- Create Image Sitemaps: Including images in your XML sitemap can help search engines discover and index your images more efficiently. Create a separate image sitemap or include image tags in your existing sitemap to improve the visibility of your images in search results.
The Bottom Line
Incorporating high-quality images into your website and avoiding the use of low-resolution images can have a significant impact on your SEO rankings and overall online visibility. By following the tips outlined in this post, you can optimize your images for search engines, enhance the user experience, and attract more organic traffic to your website. Remember, when it comes to SEO, every little detail matters, so pay close attention to the quality and relevance of the images you use on your website.
Image Square Printing
https://imagesquareprinting.com/low-res-image/

Tuesday, August 20, 2024

Digital Imaging: The Ultimate Guide to Enhancing Your Photos

Digital Imaging: The Ultimate Guide to Enhancing Your Photos
Ever wondered how some photos look like they belong in a gallery? The secret often lies in digital imaging—a blend of techniques to refine and transform your snapshots into stunning visual masterpieces. Whether you're a hobbyist or someone dipping their toes into the world of photography, enhancing your photos doesn't have to be daunting.
In this guide, we’ll dive into simple yet effective methods to elevate your images. From basic adjustments like brightness and contrast to more advanced techniques like retouching and compositing, you’ll discover tools and tips that bring your pictures to life.
Imagine tweaking colors, removing blemishes, or even adding a dramatic sky to your landscape shots. The possibilities are virtually endless. Ready to turn your ordinary photos into extraordinary pieces of art? Let’s get started!

Understanding the Basics of Digital Imaging


So, what exactly is digital imaging? At its core, digital imaging involves the creation and manipulation of visual content using digital tools. Think of it as a modern-day darkroom, where you can adjust, alter, and enhance photos with the click of a mouse.
Pixels and Resolution
First, let's talk pixels. Every digital image is made up of tiny squares called pixels. The more pixels an image has, the higher its resolution, which means finer detail and clarity. For example, an image with 3000x2000 pixels will generally look sharper than one with 800x600.
File Formats
Next up, file formats. JPEGs are great for everyday photos, thanks to their small file size and decent quality. However, if you need higher quality for professional projects, RAW files retain more detail and offer greater flexibility during editing.
Basic adjustments like brightness, contrast, and color balance are the building blocks of a good photo. Tools like cropping and rotating can help frame your subject better. Learning how to use these basic functions effectively can make a world of difference in your final image.
Understanding these fundamentals will set a solid foundation for any photographer. Ready to delve deeper? Let’s explore more advanced techniques next!

Choosing the Right Editing Software for Your Needs


Deciding on the perfect editing software can feel overwhelming, but worry not! Let's break it down so you can find the best fit for your needs.
First, consider your skill level. If you’re just starting out, beginner-friendly programs like Adobe Photoshop Elements or Canva offer intuitive interfaces and plenty of tutorials to get you up to speed. They’re great for learning the ropes without feeling overwhelmed by advanced features.
On the other hand, if you’re more experienced or willing to take the plunge, professional-grade software like Adobe Photoshop and Lightroom offer robust tools that can handle complex editing tasks. These programs provide more control over details like layers, masks, and advanced color corrections.
Budget is another factor. Free options like GIMP and Pixlr offer powerful features without costing a penny. They might not have all the bells and whistles of premium software but can still get the job done for most editing tasks.
Lastly, think about what you plan to do with your edited images. If social media is your jam, mobile-friendly apps like Snapseed and VSCO are perfect for quick edits on the go. For printing high-quality photos or working with large image files, desktop software will serve you better.
With all these options, there's definitely a perfect match for everyone. Happy editing!

Mastering Photo Composition Techniques


Getting the perfect shot isn’t just about having a fancy camera or great lighting. It’s also about mastering the art of photo composition. Let’s dive into some key techniques to help you elevate your photography game.
The Rule of Thirds
One of the basics is the Rule of Thirds. Imagine your photo divided into nine equal parts by two horizontal and two vertical lines. Position the most important elements along these lines or at their intersections. This simple trick instantly makes your photo more balanced and engaging.
Leading Lines
Leading lines guide the viewer’s eye through your photo. These can be anything from roads and rivers to fences or even shadows. By incorporating leading lines, you can create a sense of depth and draw attention to the focal point of your image.
Another handy tip is to use framing. Look for natural frames like windows, doorways, or branches to enclose your subject. This technique adds layers to your photo and makes the subject stand out more effectively.
Don’t forget to play with perspective. Try shooting from different angles—high, low, or even sideways. Changing your viewpoint can turn an ordinary shot into something extraordinary, offering a fresh and unique perspective.
Lastly, keep an eye on the background. A cluttered or distracting background can take the focus away from your main subject. Opt for simple, unobtrusive backgrounds to make your subject truly shine.
With these composition techniques in your toolkit, you’re well on your way to capturing stunning, professional-looking photos. Now, go out there and start shooting!

Optimizing Images for Different Platforms


Once you've mastered photo composition, it's time to think about how your images will look on various platforms. Different platforms have different requirements, so optimizing your images is key to ensuring they look their best everywhere.
Size Matters
First, consider the size of your images. Social media platforms like Instagram, Facebook, and Twitter each have their own optimal image dimensions and aspect ratios. For example, Instagram works best with square images (1080x1080 pixels), while Facebook cover photos should be 820x312 pixels. Make sure to resize your images according to the platform to avoid awkward cropping or pixelation.
File size is equally important. Large image files can slow down website loading times, driving visitors away. Use image compression tools like TinyPNG or JPEGmini to reduce file size without sacrificing quality. For websites, aim to keep your image file size under 200KB.
Choose the Right Format
Choosing the right image format is another crucial step. JPEGs are great for photographs and offer a good balance of quality and file size. PNGs are better for images with transparent backgrounds or text, as they maintain higher quality but come with larger file sizes. For graphics and simple images, consider using SVGs; they are scalable and lightweight, making them perfect for logos and icons.
Alt text is essential for web images. This not only improves your site's accessibility for visually impaired users but also provides better SEO. Be descriptive in your alt text to make your images work harder for you in search engines.
Lastly, always test your images. Check how they appear on different devices and platforms before making them live. Sometimes, what looks good on a desktop might not look as great on mobile or tablet.
By optimizing your images for different platforms, you ensure they look professional and engaging, no matter where they are viewed. Happy posting!

The Bottom Line: Enhancing Your Photos Like a Pro


So, what's the takeaway? Enhancing your photos like a pro doesn't have to be complicated. With a few easy steps, you can significantly improve the quality and impact of your images.
First, focus on composition. Pay attention to framing, lighting, and the rule of thirds. These basics can instantly make your photos more compelling and aesthetically pleasing.
Next, leverage the power of editing tools. Whether it's brightening a photo, adjusting contrast, or adding a filter, editing can make a world of difference. But remember, less is often more—subtle adjustments usually yield the best results.
Don't overlook the importance of optimizing images for different platforms. From resizing and compressing to choosing the right format, these small tweaks ensure your images look great and load quickly, no matter where they're viewed.
Finally, always test your images on various devices. What works on a desktop might look entirely different on a smartphone. Testing helps maintain a consistent and professional appearance across all screens.
Armed with these tips, you're now ready to take your photos to the next level. Remember, practice makes perfect. So, keep experimenting and refining your skills.
Your audience will undoubtedly appreciate the effort you put into enhancing your photos. Whether you're a blogger, a small business owner, or simply a social media enthusiast, better photos can make a lasting impact.
Happy snapping!
Image Square Printing
https://imagesquareprinting.com/digital-imaging/

Saturday, August 17, 2024

How to Create Eye-Catching Street Poster Prints

How to Create Eye-Catching Street Poster Prints
Imagine strolling down the street and suddenly, a vibrant poster grabs your attention. That’s the power of a well-designed wheatpaste posters also known as street poster! These visual gems can stop people in their tracks, convey a message in seconds, and leave a lasting impression.
Creating eye-catching street posters isn't just about throwing together some flashy images and bold text. It involves a mix of creativity, design principles, and understanding your audience. From choosing the right colors to crafting compelling messages, every detail matters.
Ready to master the art of street poster design? Let's dive into the essential tips and tricks that will help you create posters that not only catch eyes but also captivate hearts.

Understanding the Basics of Street Poster Design


Creating an eye-catching street poster starts with understanding the fundamentals of design. The very first element to consider is clarity. Your message should be easy to read at a glance. Think bold, large fonts for headlines, and keep secondary text concise.
The Power of Color
Color is your best friend when it comes to making your poster stand out. Use contrasting colors to make important elements pop. But be wary of using too many colors, which can overwhelm the viewer. A good rule of thumb is to limit your palette to two or three main colors.
Imagery also plays a crucial role. A high-quality image can convey emotions and capture attention quickly. Always use high-resolution images and ensure they align with the tone and message of your poster.
Balancing Act: Layout
Your layout should guide the viewer’s eye towards the most important information. Utilize design principles like symmetry, balance, and alignment to create a harmonious look. Don’t cram too much information into one space; white space is essential for readability.
Finally, consider your audience. What appeals to them? Tailor your design to match their interests and tastes. By understanding these basics, you’ll lay a strong foundation for an eye-catching street poster that resonates with viewers.

Selecting the Right Colors and Fonts for Maximum Impact


Choosing the right colors and fonts can make or break your street poster. Colors evoke emotions, so think about the feelings you want to ignite in your audience. Warm colors like red and yellow grab attention but can be overwhelming if overused. Cooler shades like blue and green bring a calming effect and balance.
When it comes to fonts, less is more. Stick to one or two fonts to keep your design clean. Make sure your main font is bold and easy to read from a distance. Script fonts can add elegance but avoid using them for large blocks of text as they can be hard to read.
Contrast is key. Pair a bold font with a simpler one to create a visual hierarchy. This helps guide the viewer’s eye through the poster, ensuring the important information stands out.
Lastly, think about accessibility. Ensure your text is readable against the background. High-contrast combinations like black text on a white background or white text on a dark background are always a safe bet. By smartly selecting colors and fonts, you’ll create a powerful design that stands out and communicates effectively.

Utilizing High-Quality Images and Graphics


Images and graphics are the heart of any captivating street poster. High-quality visuals draw people in and make your poster memorable. Grainy or pixelated images can make your poster look unprofessional, so always opt for high-resolution files.
Consider the mood you want your images to convey. Bright, vibrant pictures work well for upbeat events, while more subdued tones might be better for serious messages. Make sure your visuals are relevant to your content.
Graphics like icons and illustrations can help break up text and make your poster more engaging. They can also direct attention to important points. Just make sure they don't overwhelm the design. A balanced layout is key.
Don't forget about brand consistency. If you're creating a series of posters, use images and graphics that share a similar style. This creates a cohesive look and reinforces brand recognition.
Lastly, pay attention to alignment and spacing. Properly spaced images and graphics can make your poster look polished and easy to navigate. With high-quality visuals and thoughtful design, your street poster will not only attract attention but leave a lasting impression.

Placement Strategies for Maximum Exposure


Where you place your street poster is just as important as the design itself. To get the maximum exposure, start by scouting high-traffic areas. Think busy sidewalks, bus stops, and popular cafes – these spots guarantee more eyes on your poster.
Next, consider the height at which you place your poster. Eye-level is always a good bet. If people have to strain their necks to see it, chances are they'll just walk on by. Make it easy for them to notice your message.
Timing is also crucial. If you’re advertising an event, put your posters up about two to three weeks in advance. This gives people ample time to see and remember it, but not so much time that they forget about it.
Don’t overlook community boards. Many cities have designated spots for posting flyers and posters. These boards already attract people looking for local happenings, making them a prime spot for your poster.
Finally, be strategic with the number of posters. Saturate key areas without going overboard. Too many posters in one place can make your message blend into the background noise. A few well-placed posters can be far more effective than a barrage.
With smart placement strategies, you’ll ensure your street posters get the attention they deserve.

Implementing QR Codes and Interactive Elements


Adding QR codes and interactive elements to your street posters can take engagement to the next level. People love interactive content – it makes them feel involved and curious.
QR codes are a simple way to connect the physical with the digital. Link the code to your website, event page, or a special offer. Make sure it’s easy to scan; avoid placing them on dark or overly busy backgrounds.
Interactive elements can go beyond QR codes. Think about adding tear-off tabs with your contact details or discount codes. People can take a piece of your poster with them, making it more likely they’ll engage with your content later.
Consider incorporating augmented reality (AR) elements. With AR apps, users can point their smartphones at the poster and see special animations or videos. This tech-savvy approach can make your poster stand out and spark interest.
Always include a clear call to action, guiding people on what to do next – "Scan the QR code for more info" or "Take a tab and get a discount." Clear instructions ensure people know how to interact with your poster.
Using these simple yet effective elements can significantly boost the reach and impact of your street poster campaigns.

Printing Techniques for Vibrant Poster Prints


Choosing the right printing technique is crucial for achieving vibrant poster prints that catch the eye. You want your colors to pop and your text to be crisp, ensuring your message is loud and clear.
Digital Printing
Digital printing is a popular choice for small batch posters. It offers high-quality prints with vivid colors, and it's cost-effective for low quantities. Plus, you can easily make adjustments to your design without much hassle.
Offset printing, on the other hand, is ideal for large quantities. This traditional method provides consistent color and sharp detail, making your posters look professional. The initial setup costs might be higher, but it's economical for big print runs.
Paper Quality Matters
Don't overlook paper quality. Glossy paper can make colors more vibrant, while matte paper reduces glare and is easier to read under different lighting conditions. Think about where your posters will be displayed and choose accordingly.
Special inks and finishes can also add a unique touch. Metallic inks or spot UV coating can highlight key areas of your design, making them stand out even more. These little extras can make a big difference in catching someone’s eye.
By selecting the right printing techniques and materials, you can ensure your posters are not only vibrant and engaging but also durable and professional-looking. It's all about making a strong impression!

The Bottom Line: Tips for Creating Memorable Street Poster Designs


Creating memorable street posters involves a mix of eye-catching design, clear messaging, and high-quality printing. First and foremost, keep your design simple yet striking. Use bold colors and strong visuals to grab attention quickly, but don’t overcrowd your poster. Less is often more.
Next, your message should be clear and concise. People usually spend only a few seconds looking at posters, so make sure your main point stands out. Use large, readable fonts and consider adding a catchy headline that gets straight to the point.
Don’t forget the importance of quality printing. A vibrant, well-printed poster can make a huge difference in how your design is perceived. Choose the right paper and printing technique based on your needs and budget. Digital printing works great for small quantities, while offset printing is perfect for larger orders.
Think about where your posters will be displayed and choose your materials accordingly. Glossy paper can make colors pop but might glare, while matte paper offers readability under various lighting conditions.
Finally, be a little adventurous with special touches like metallic inks or spot UV coating. These extras can make certain elements of your design stand out, adding that extra wow factor.
In the end, designing a memorable street poster is about making thoughtful choices. Keep your design clean, your message clear, and invest in quality printing. Your effort will pay off when your poster catches someone’s eye and leaves a lasting impression.
https://imagesquareprinting.com/street-poster-prints/

Must-Have Trade Show Booths: Stand Out and Attract Visitors

Must-Have Trade Show Booths: Stand Out and Attract Visitors
Trade shows are buzzing with energy, filled with companies trying to capture the attention of passersby. In this lively environment, how can you make sure your booth isn’t just another face in the crowd?
The secret isn't just in flashy signs or free swag—though they help! It’s all about creating an engaging and memorable experience for your visitors. From eye-catching designs to interactive elements, there are key features every must-have booth should include.
Ready to turn your trade show booth into a magnet for potential customers? Let's dive into the essentials that will make your space impossible to ignore.

Design a Bold and Eye-Catching Booth


First impressions matter, especially at trade shows. Your booth’s design should stop people in their tracks. Think vibrant colors, bold graphics, and clear messaging.
Create Visual Impact
Utilize large, high-resolution images that represent your brand. Incorporate your logo and key messages in a way that’s easily visible from a distance. Remember, simple and striking trumps cluttered and confusing.
Add Unique Elements
Interactive elements like touch screens, virtual reality setups, or live demos can draw visitors in. They offer a chance for guests to engage with your products directly, making their experience more memorable.
Consider the layout too. An open, inviting space encourages people to step in and take a look around. Use lighting strategically to highlight focal points and create an inviting atmosphere.
Ultimately, your booth should reflect your brand’s personality while offering a refreshing change from typical displays. When executed well, a bold and eye-catching booth captivates the audience and effectively communicates your brand’s message.

Incorporate Interactive Elements for Engagement


Engaging visitors goes beyond having an eye-catching booth. It's about making their experience unforgettable through interactive elements.
Dive into Digital
Introducing touch screens is a fantastic way to provide information in an engaging manner. Visitors can browse through product catalogs, watch demo videos, or even sign up for newsletters. This interaction keeps them at your booth longer and deepens their connection with your brand.
VR and AR Experiences
Virtual and augmented reality experiences can be a game-changer. They offer immersive ways for visitors to understand your product or service. Imagine showcasing a virtual tour of your factory or letting visitors "try" your product in a virtual space. It's unique and incredibly engaging.
Host Live Demonstrations
Nothing beats seeing a product in action. Live demonstrations allow attendees to experience firsthand how your product or service works. This can be incredibly persuasive and create a buzz around your booth.
By incorporating these interactive elements, you'll not only attract more visitors but also foster meaningful connections that can lead to lasting relationships.

Showcase Your Products Creatively


Standing out in a sea of booths means showcasing your products in imaginative ways that catch the eye.
Use bold and colorful displays that highlight your products' best features. Arrange items at different heights and angles to create visual interest. Lighting plays a crucial role here - spotlights can make your products shine, quite literally.
Interactive product displays can also make a big impact. Allow visitors to touch, try, or experience your products firsthand. This tactile engagement helps them connect better with what you're offering.
Storytelling is another powerful tool. Using posters, videos, or even live narrations, tell the story behind your products. Why were they created? What problems do they solve? A compelling story can turn a simple display into a memorable experience.
Lastly, don't shy away from novelty. Utilize augmented reality, holograms, or other tech to present your products in a futuristic way. The goal is to make your booth not just a place to see products, but a must-visit destination for an experience.
These creative showcasing strategies will ensure your products leave a lasting impression on every visitor.

Utilize Branded Giveaways to Attract Traffic


Who doesn't love free stuff? Branded giveaways are a fantastic way to draw visitors to your booth and leave them with a lasting reminder of your brand.
Make It Useful
Choose giveaways that are practical and useful. Items like pens, reusable bags, USB drives, or phone chargers are always appreciated. Each time someone uses one of these items, they'll think of your brand.
Unique and Fun
Don't be afraid to get a bit creative. Think of unique and fun items that reflect your brand's personality. Custom socks, quirky stress balls, or eco-friendly products can set you apart and become a talking point.
Make sure your branding is clear but tasteful. Your logo and contact info should be visible, but the item should still look appealing enough that people want to use it.
Engage visitors by turning the giveaway into a game. Simple activities like a spin-the-wheel for prizes or a small quiz can make the experience more interactive and entertaining, ensuring that your booth is a highlight of the event.
Remember, the key is to offer something valuable and memorable. A well-chosen giveaway can create positive impressions and keep your brand at the forefront of people's minds long after the event ends.

Implement Technology to Enhance Visitor Experience


Leveraging technology can significantly elevate the experience for visitors at your booth, making it more engaging and memorable.
Interactive Displays
Interactive displays are a brilliant way to capture attention. Touchscreen kiosks or tablets can showcase product videos, offer interactive demos, or provide detailed information about your services. This not only makes your booth more engaging but also allows visitors to explore at their own pace.
Virtual and Augmented Reality
Consider incorporating virtual or augmented reality experiences. VR can transport visitors to a different world, perhaps a virtual tour of your facilities or a 3D demonstration of your product in action. AR can overlay digital information onto real-world objects, creating a mixed-reality experience that's both educational and fun.
Mobile Apps
A dedicated mobile app for your booth can provide visitors with an enhanced experience. Use it to share exclusive content, offer scavenger hunts or challenges, and collect valuable feedback. A well-designed app can keep visitors engaged even after they leave your booth.
Digital Signage
Replace static posters with digital signage to dynamically display information and attract more eyeballs. Use it for rotating content, such as promotions, customer testimonials, or live social media feeds. Digital signs are not only eye-catching but also more adaptable to changes and updates.
Using these technologies can make your booth a tech-savvy hub, drawing in tech enthusiasts and those curious about innovative solutions. A tech-enhanced experience can effectively highlight your brand's forward-thinking nature and commitment to providing top-notch experiences.

Maximize Social Media Exposure for Pre-Event Buzz


Creating a buzz on social media before your event can significantly amplify your reach and draw more visitors to your booth.
Start by announcing your participation in the event early. Share details about your booth, what attendees can expect, and any special activities or giveaways. Use eye-catching graphics and short videos to make your posts stand out.
Engage your audience with interactive content. Host a countdown to the event, run polls, or ask questions related to your industry. This not only gets people talking but also keeps your event top of mind.
Collaborate with influencers or industry partners to broaden your reach. Their endorsement can introduce your booth to a wider audience and lend credibility to your brand.
Leverage event hashtags to join the larger conversation. Using the official event hashtag can help you connect with other attendees and increase the visibility of your posts.
Lastly, consider running social media ads targeted at event attendees or those interested in related topics. Ads can boost your visibility and ensure your content reaches potential visitors who might have otherwise missed it.
By actively engaging with your audience and tapping into the power of social media, you can create anticipation and ensure a steady stream of visitors eager to check out your booth.

Capture Leads Effectively with Call-to-Actions


When you're at an event, capturing leads is key. To do this effectively, your call-to-actions (CTAs) need to be clear and compelling.
A great place to start is your booth design. Make sure your CTAs are prominent and visible from a distance. Banners, posters, and digital screens should all highlight what you want attendees to do, whether it's signing up for a newsletter, booking a demo, or entering a contest.
Make It Easy
Simplicity is crucial. Use straightforward language and clear instructions. For instance, "Sign up here for exclusive insights" or "Scan this QR code for a chance to win." The easier it is for visitors to understand and act on your CTA, the better your results will be.
Incorporate digital tools to streamline lead capture. Tablets and mobile devices can quickly collect contact information. Using digital forms also allows you to directly input data into your CRM, reducing the chance of errors and speeding up follow-ups.
Engage with Incentives
Offering incentives can significantly boost the effectiveness of your CTAs. Prizes, discounts, or exclusive content can provide that extra nudge needed to get visitors to take action. Make sure the value of your incentive is clearly communicated.
Lastly, train your staff to engage with attendees and guide them towards your CTAs. Personal interactions can build trust and make your offers feel more genuine. Remember, a well-placed and well-timed CTA can turn a casual visitor into a valuable lead!

The Bottom Line: Measure Success and Improve Your Booth Strategy


Wrapping up your event, it's crucial to measure the success of your booth strategy. Start by reviewing the number of leads captured, the quality of those leads, and how they transition into your sales funnel.
Tracking these metrics helps identify what worked and what didn’t. If certain call-to-actions engaged attendees more effectively, replicate and refine them for future events. On the other hand, pinpointing the less successful elements allows you to make necessary adjustments.
Feedback collection is another essential step. Engage both your team and the attendees to gather insights. Ask your team about their interactions and any obstacles they encountered. Survey attendees to understand their experience and what drew them to your booth.
Analyze your engagement tactics. Did offering incentives lead to a spike in leads? Was there a particular interaction or tool that stood out? By understanding these dynamics, you can fine-tune your approach to create a more compelling presence next time.
Additionally, consider the overall layout and design of your booth. Evaluate how the space was used and whether it facilitated smooth visitor flow. Alongside visual appeal, practical considerations significantly impact visitor engagement.
Lastly, always look ahead. The data and insights gathered post-event are invaluable for planning your next strategy. Continuously improving based on real-world feedback ensures your booth becomes more effective and engaging with each event.
In conclusion, measuring success is not just about numbers; it's about understanding behaviors and preferences. By doing so, you set a strong foundation for ongoing improvements, leading to a dynamic and successful booth strategy.
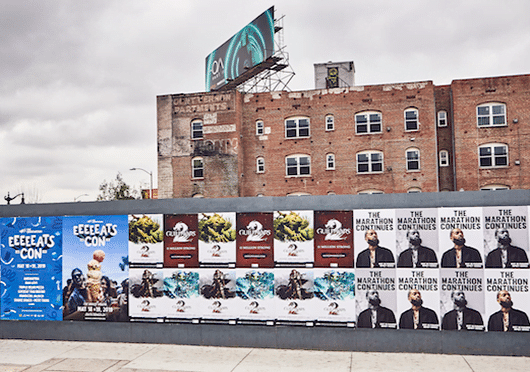
Image Square Large Format Printing
#exhibition,#expo,#tradefair,#convention,#show,#networking,#business,#marketing,#printing,#printdesign,#graphicdesign,#digitalprinting,#offsetprinting,#largeformatprinting,#banners
https://imagesquareprinting.com/trade-show-booths/